VMMask
Legacy guide: screenshots and helper-tool steps may differ from the current product.
This is an English translation of a legacy guide. For the original wording, read the Chinese original.
To set up a Proxy302 proxy in the VMMask fingerprint browser, you need to use it after enabling scientific internet access. If you do not have scientific internet access, please refer to the Non-Overseas Connection Tutorial; if you already have scientific internet access, please refer directly to the Overseas Connection Tutorial.
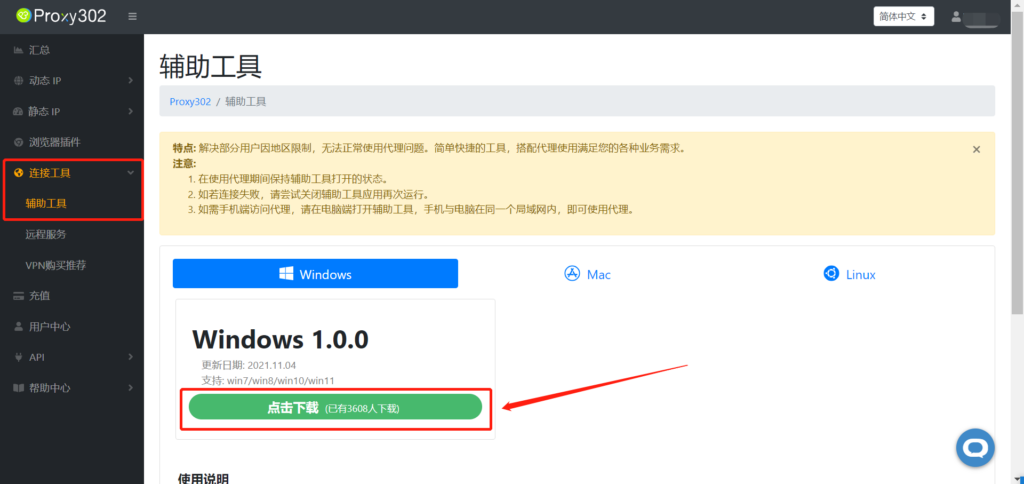
Non-Overseas Connection Tutorial1. Log in to the Proxy302 client, open [Connection Tools]-[Auxiliary Tools], and click to download.
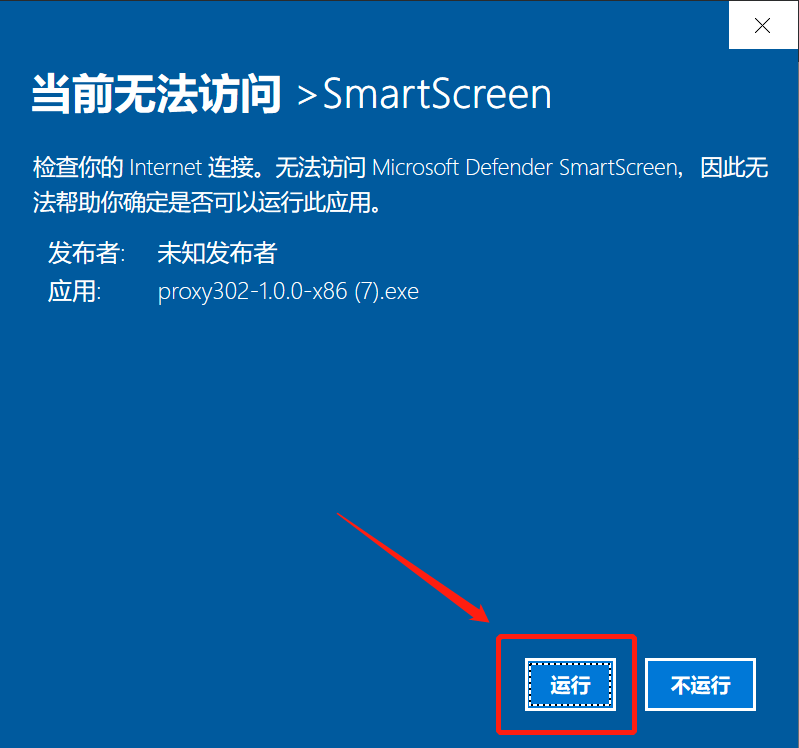
2. Run the application.
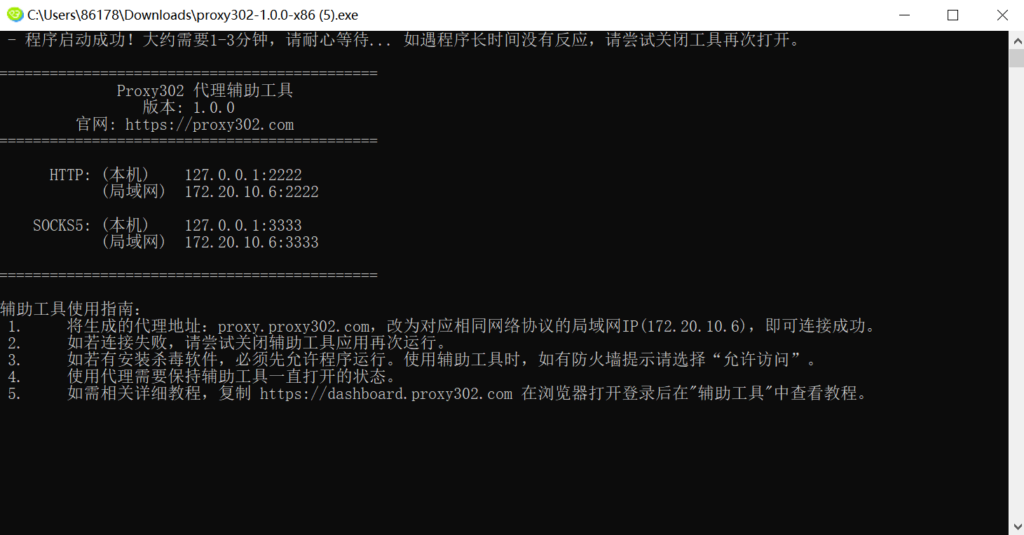
3. Wait for it to load. Once loaded successfully, as shown in the image below, the auxiliary tool has started successfully. Minimize it to keep the tool running in the background.
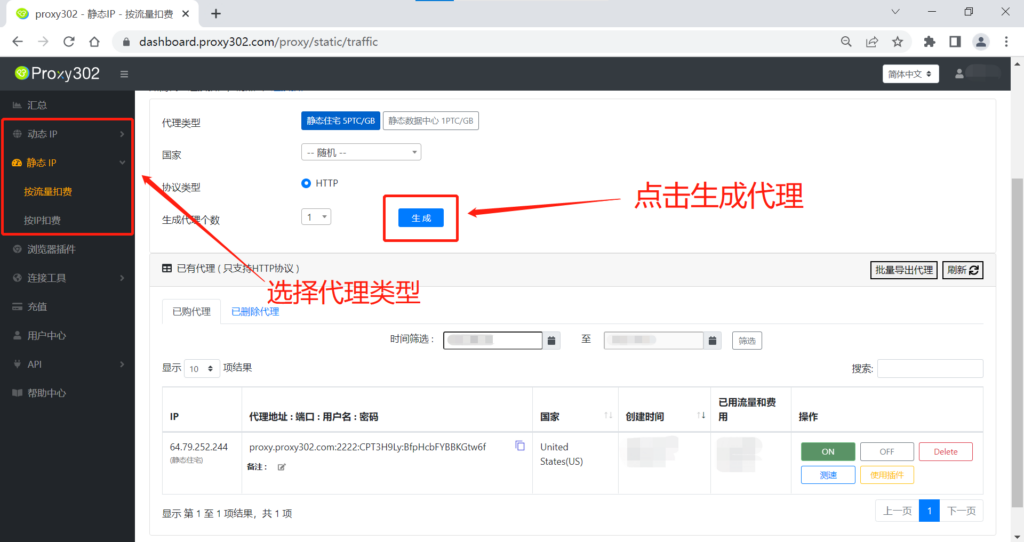
4. Log in to the Proxy302 client, select the required proxy type, country, and protocol type (Http proxy/Socks 5 proxy), and click to generate the proxy.
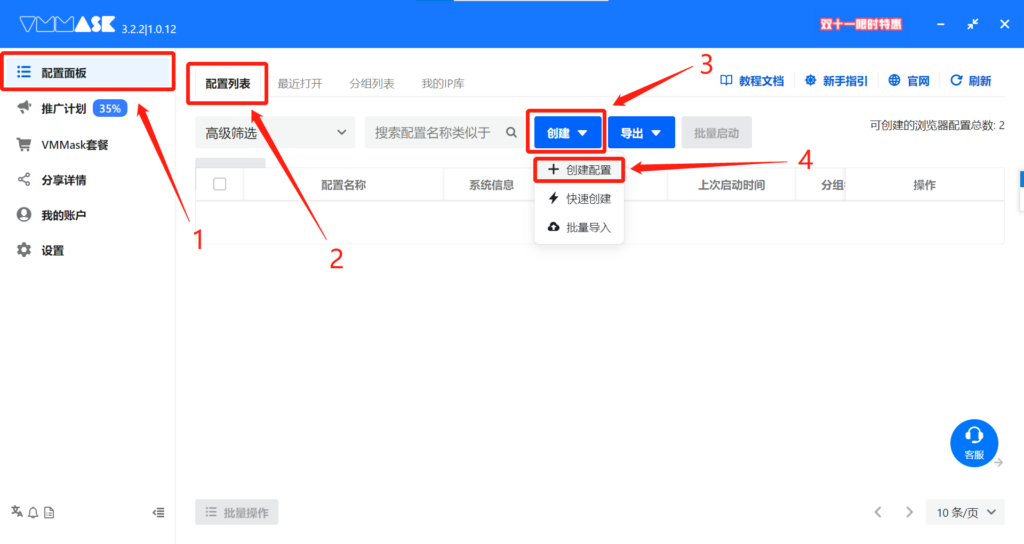
5. Log in to the VMMask browser, open [Configuration Panel]-[Configuration List], click [Create], and select [+ Create Configuration].
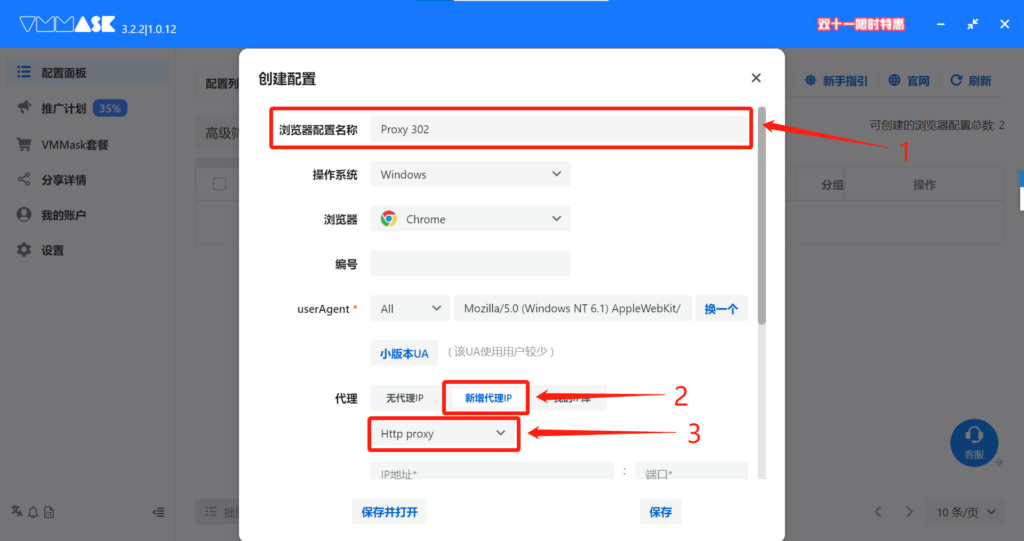
6. Enter a browser configuration name to distinguish between accounts. Click [Add Proxy IP] and select the protocol corresponding to the proxy (Http proxy/Socks 5 proxy).
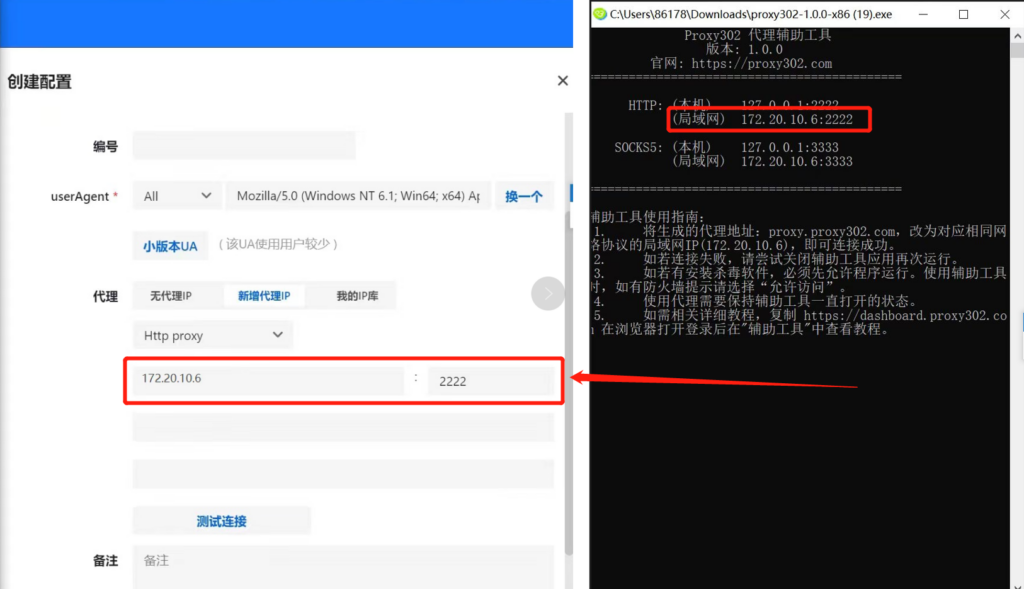
7. Open the auxiliary tool and fill the LAN [Proxy Address, Proxy Port] into the [IP Address, Port] input boxes of the VMMask browser.
8. Open the Proxy302 client, copy and paste the generated [Proxy Username, Proxy Password] into the [Account, Password] fields in the VMMask browser.
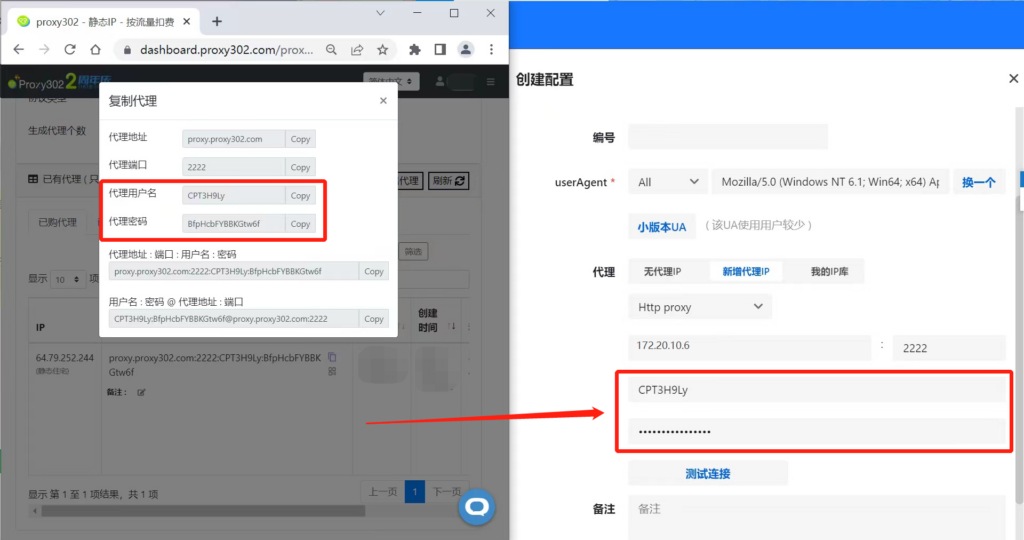
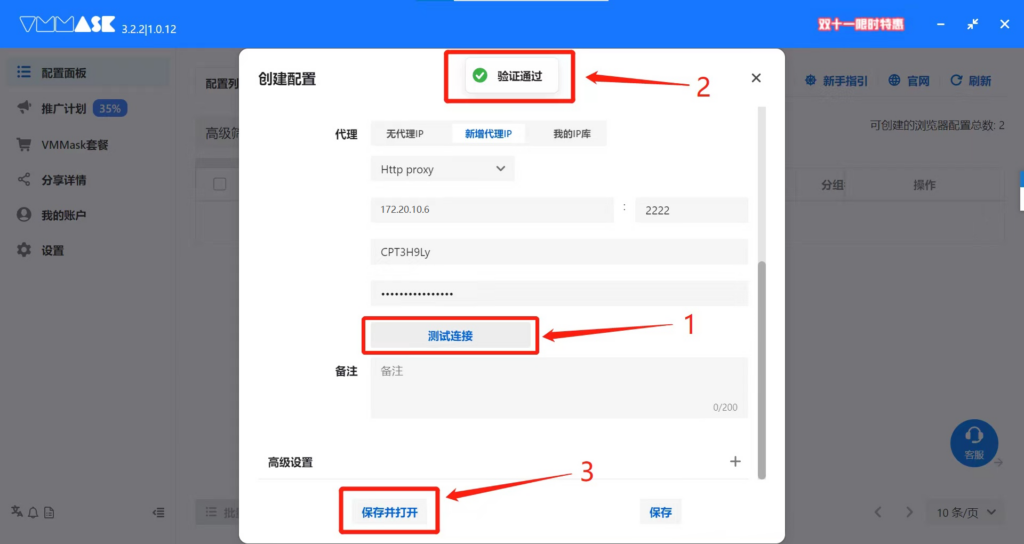
9. Click [Test Connection]. Once the proxy is successfully connected, a [Verification Passed] prompt box will appear. Click Save and Open to start using it.
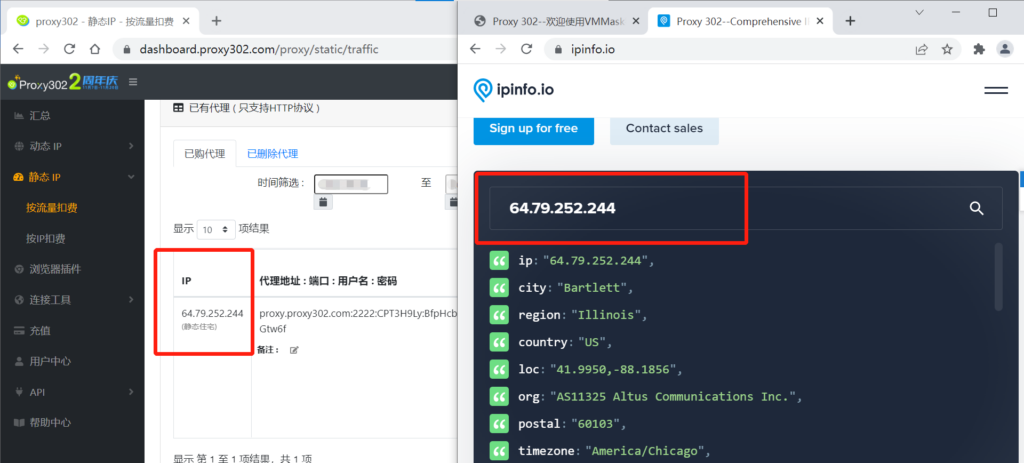
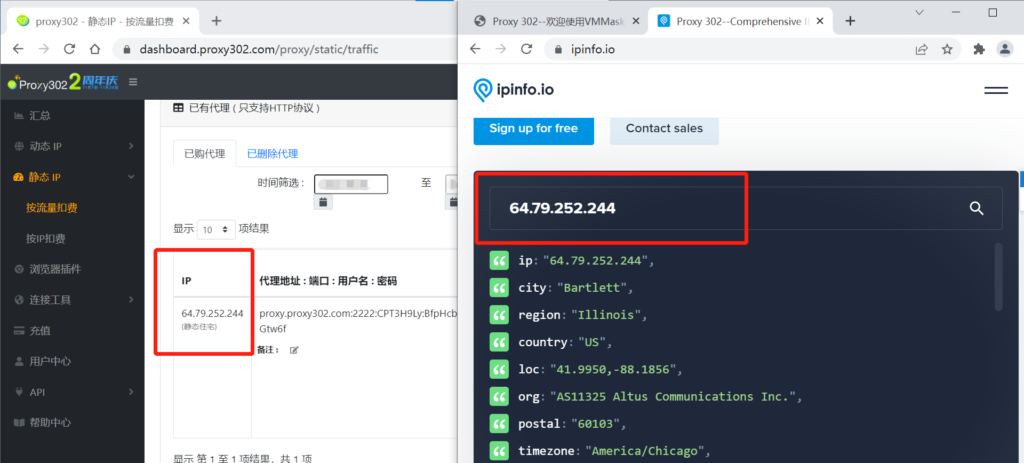
10. Enter "ipinfo.io" in the browser. If the IP address on the page matches the configured proxy IP, the proxy is set up successfully.
Overseas Connection Tutorial
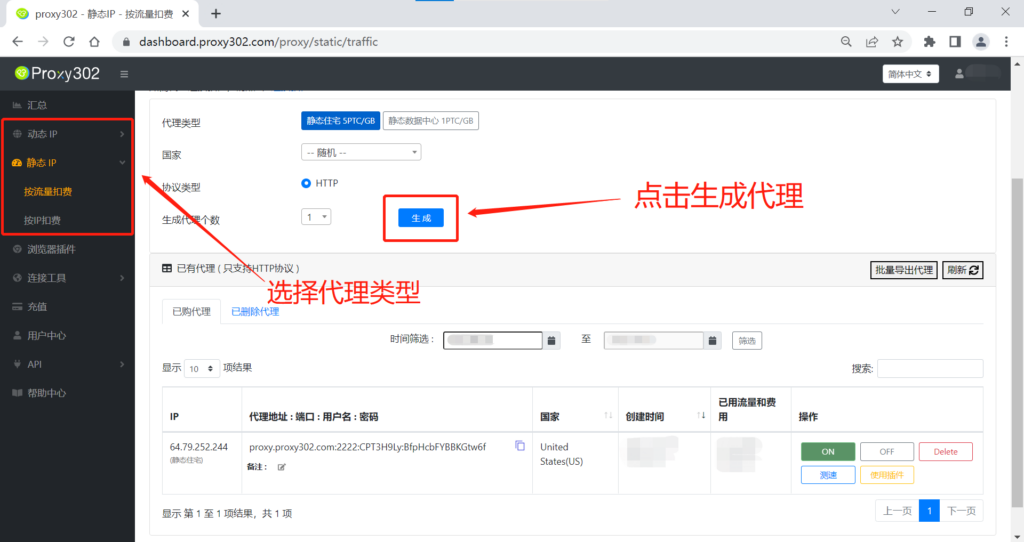
1. Log in to the Proxy302 client, select the required proxy type, country, and protocol type (HTTP/SOCKS5), and click to generate the proxy.
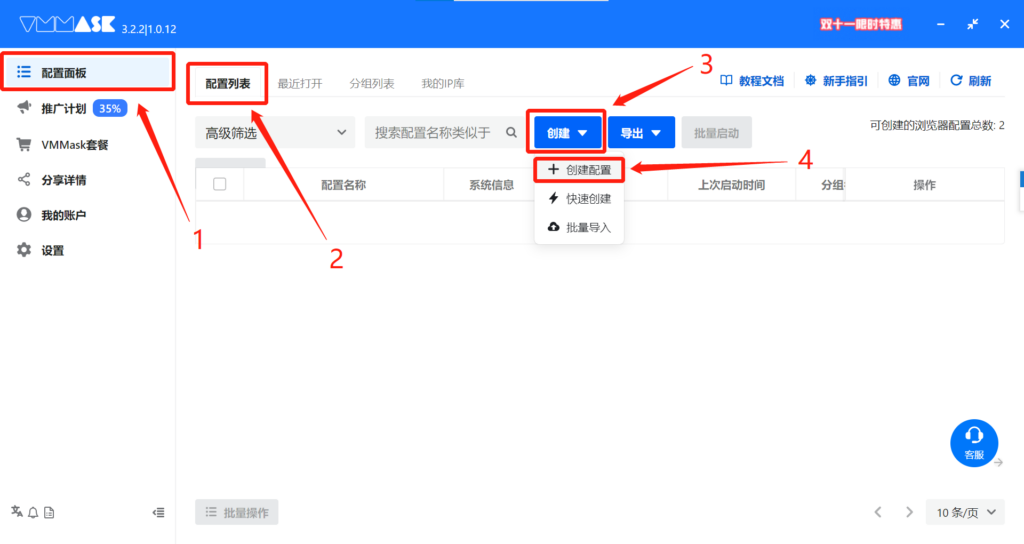
2. Log in to the VMMask browser, open [Configuration Panel]-[Configuration List], click [Create], and select [+ Create Configuration].
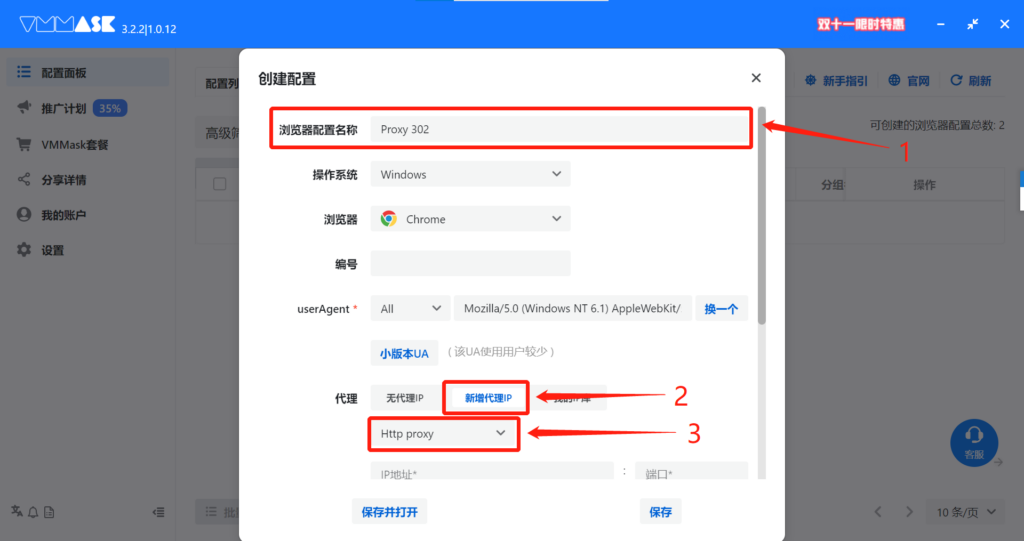
3. Enter a browser configuration name to distinguish between accounts. Click [Add Proxy IP] and select the protocol corresponding to the proxy (Http proxy/Socks 5 proxy).
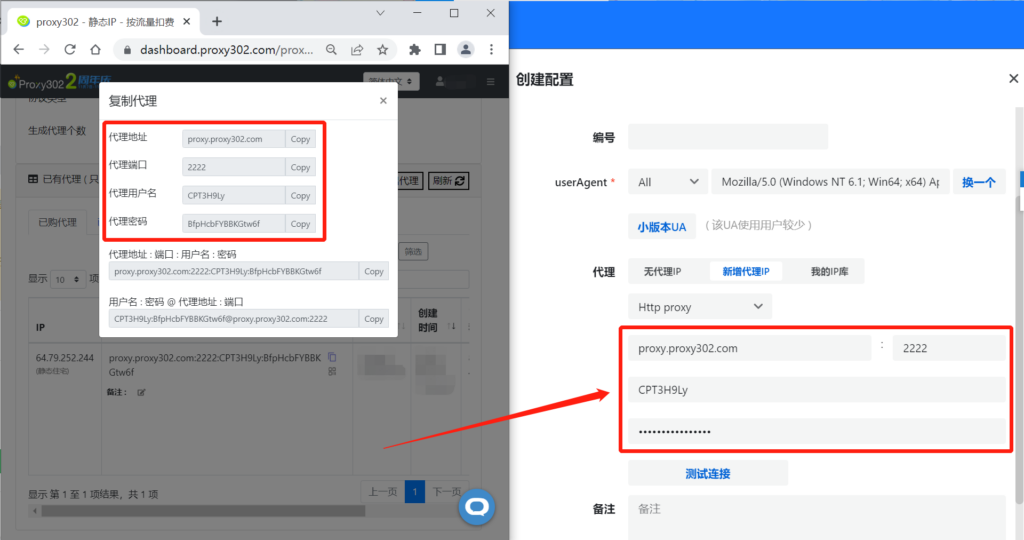
4. Open the Proxy302 client, copy and paste the generated [Proxy Address, Proxy Port, Proxy Username, Proxy Password] into the [IP Address, Port, Account, Password] fields in the VMMask browser.
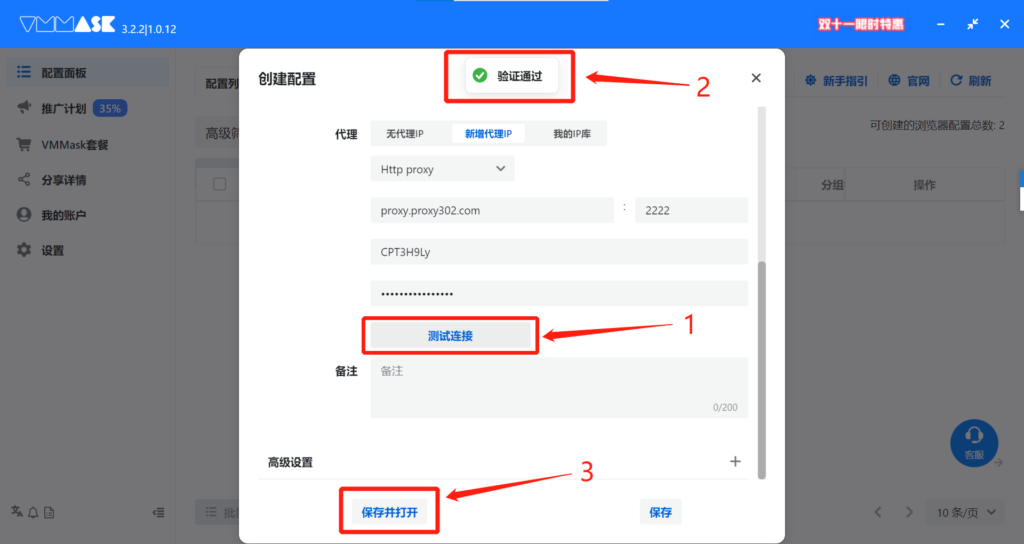
5. Click [Test Connection]. Once the proxy is successfully connected, a [Verification Passed] prompt box will appear. Click Save and Open to start using it.
6. Enter "ipinfo.io" in the browser. If the IP address on the page matches the configured proxy IP, the proxy is set up successfully.