How to Use Quick Access?
Legacy guide: screenshots and helper-tool steps may differ from the current product.
This is an English translation of a legacy guide. For the original wording, read the Chinese original.
- Proxy302 Plugin Download and Installation
- Non-Overseas Environment Usage Tutorial
- Overseas Environment Usage Tutorial
1. Open the [Browser Plugin] interface and click to download the [Extension Plugin Package].
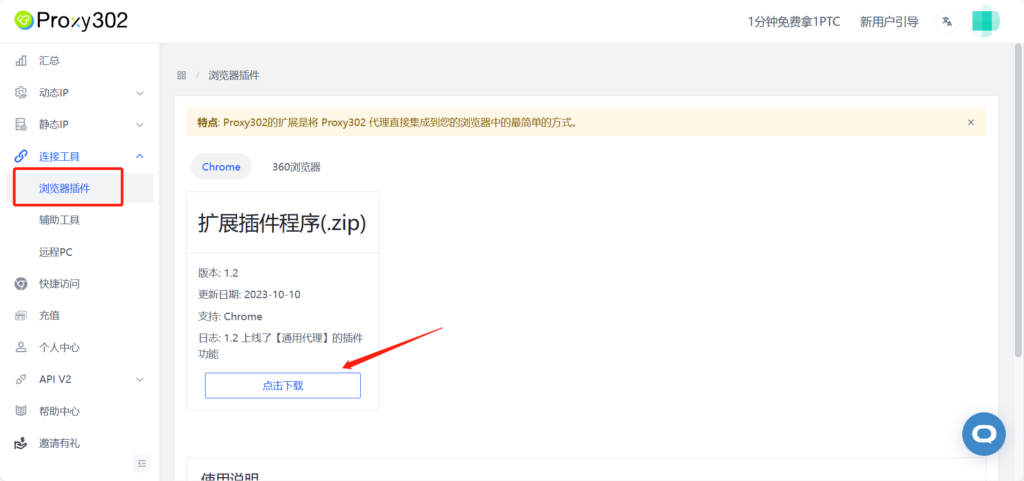
2. Unzip the entire [Proxy-chrome-extension].
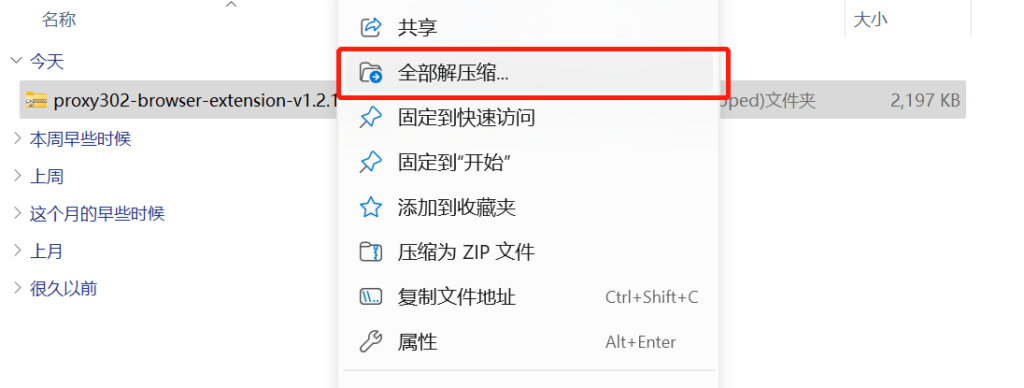
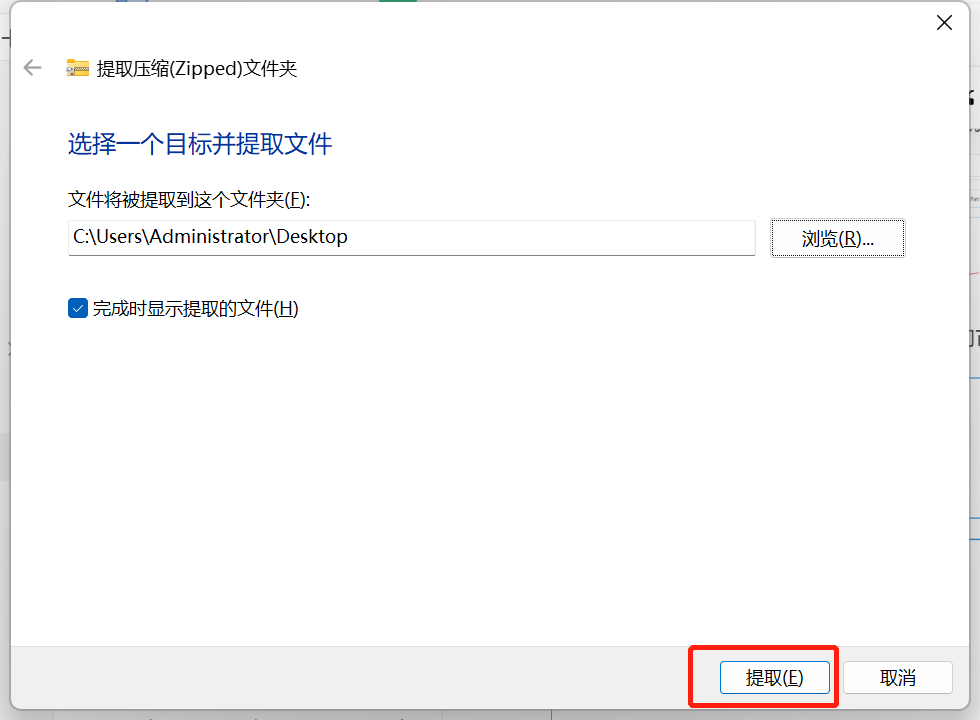
3. Click to extract it to your computer desktop and wait for the copy to complete.
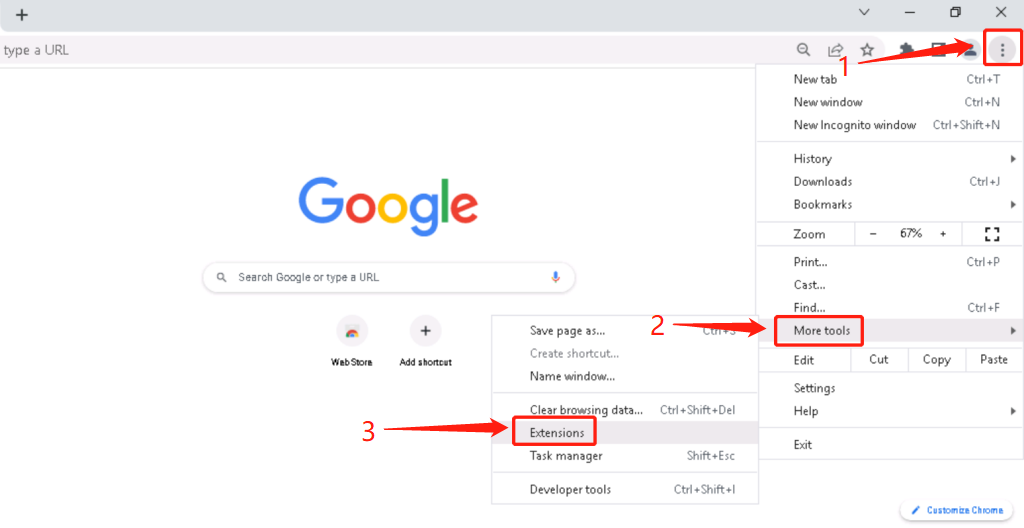
4. Open the Google browser, click the top right corner - [More Tools] - [Extensions].
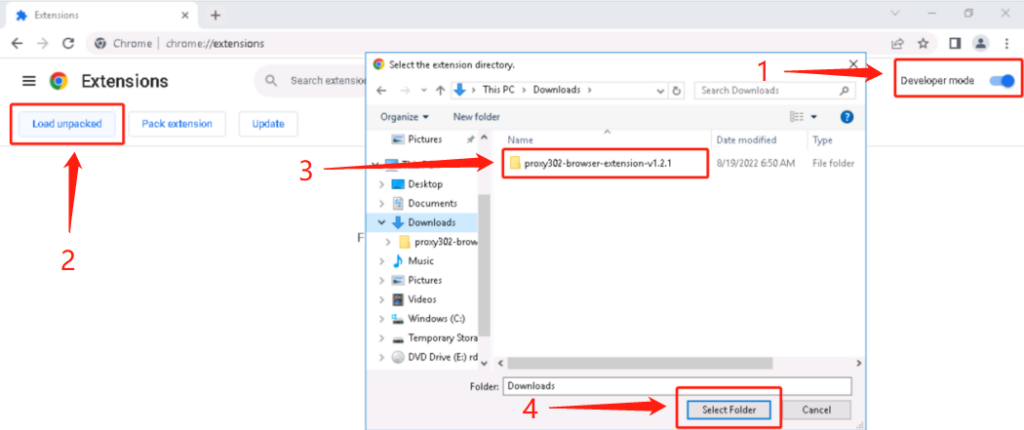
5. Turn on [Developer mode], click [Load unpacked], select the [Proxy-chrome-extension] folder, and once the extension is loaded, the Proxy302 plugin is successfully installed.
1. Open [Connection Tool] - [Auxiliary Tool] and click to download.
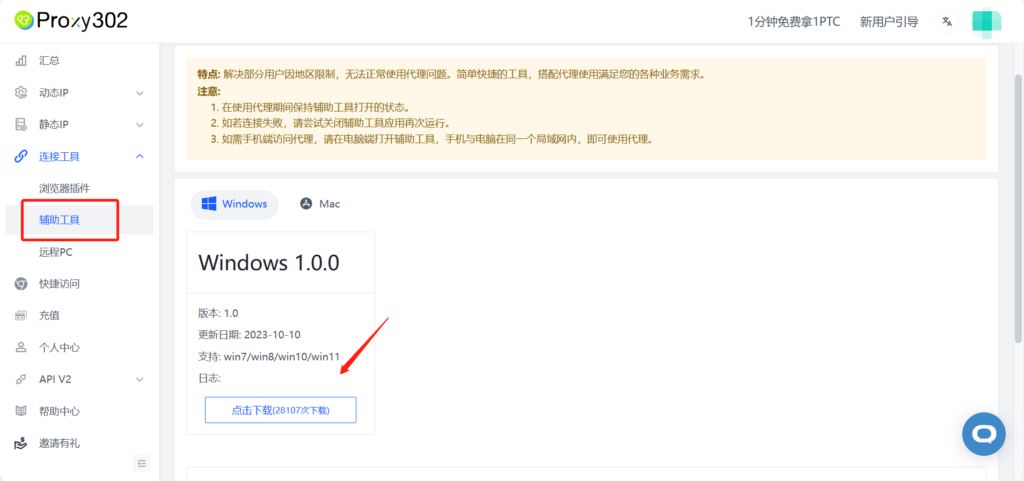
2. Run the application.
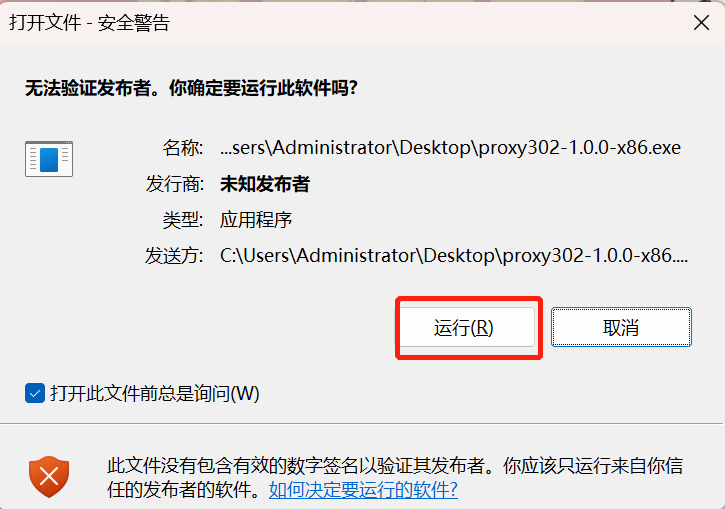
3. Wait for it to load. Once loaded successfully, as shown in the image below, the auxiliary tool has started. Minimize it to keep the tool running in the background.
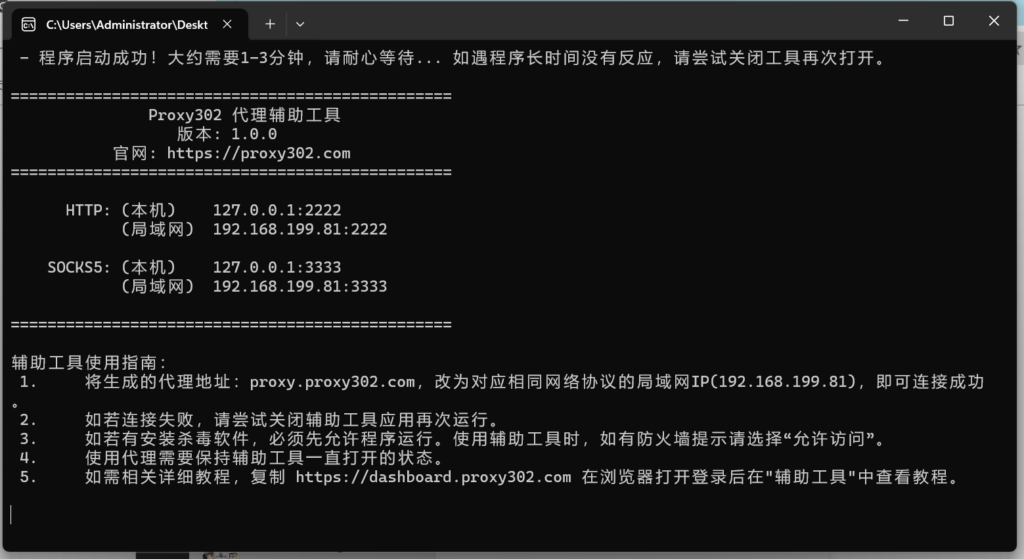
4. Click [Quick Access] and click Add.
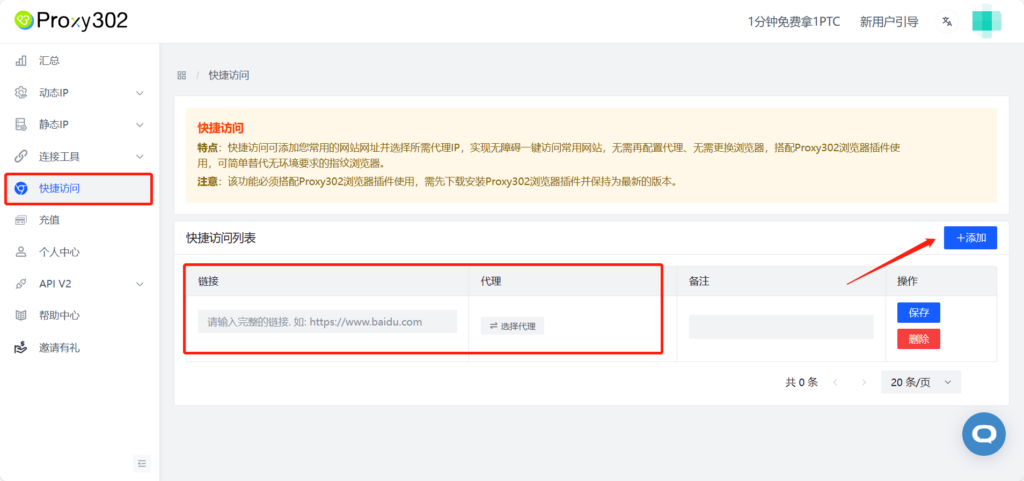
5. Enter the full link of the website you frequently visit (e.g., https://www.google.com) and click Select Proxy.

6. Select the required proxy. You can directly choose an already generated proxy IP (proxy IPs generated within the account are universal for this Quick Access feature), or you can generate a new IP.
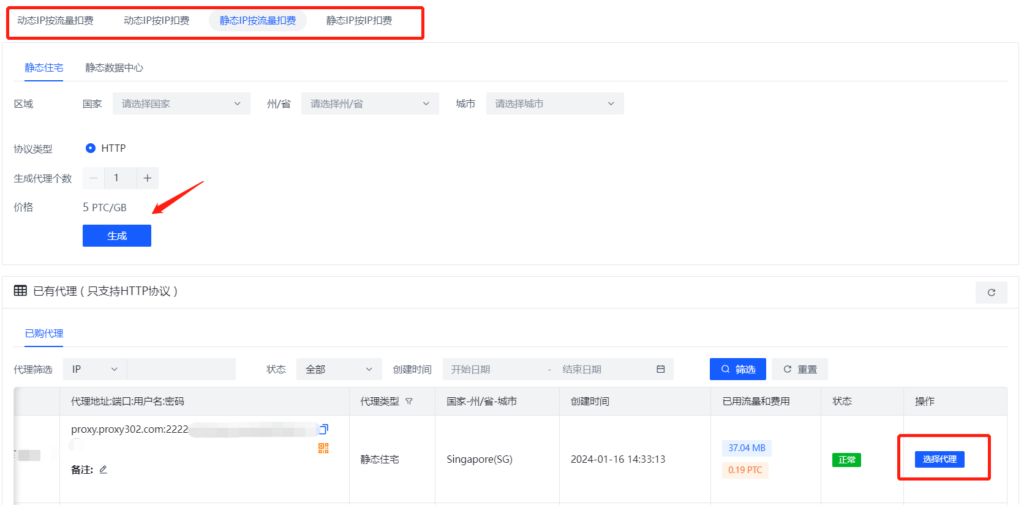
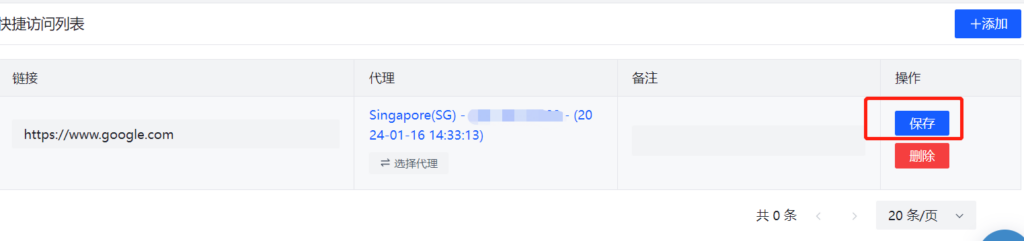
7. After selecting the proxy IP, click Save.
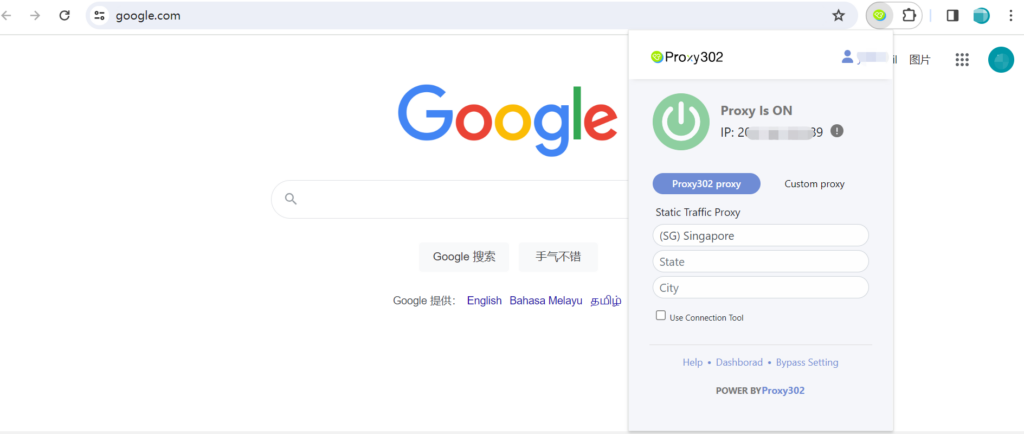
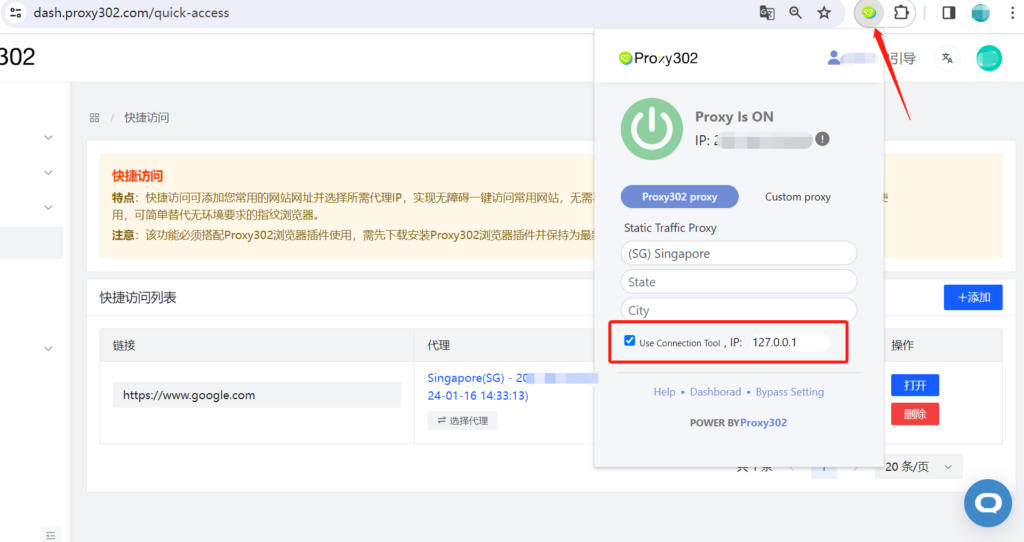
8. Click the plugin and open Use Connection Tool in the Proxy302 browser plugin.
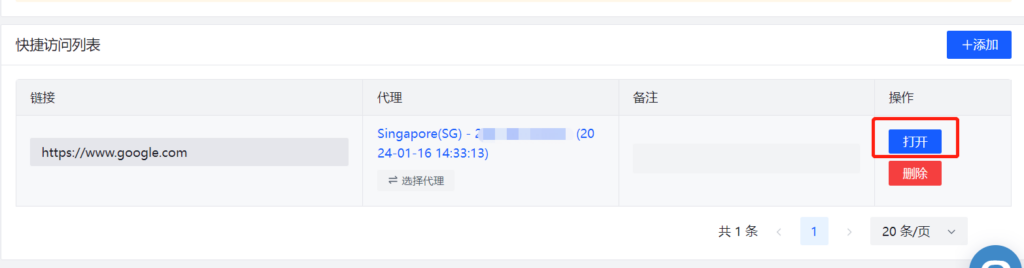
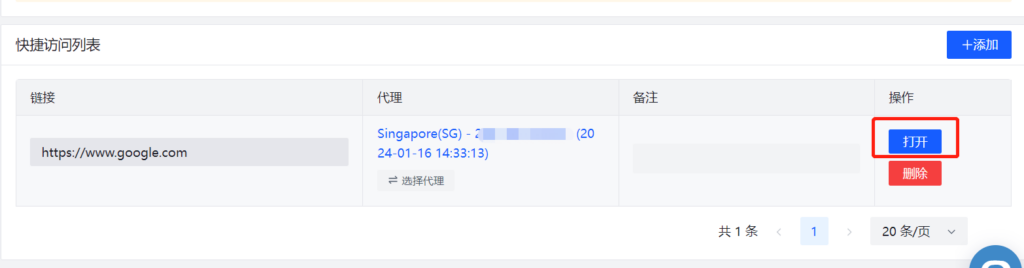
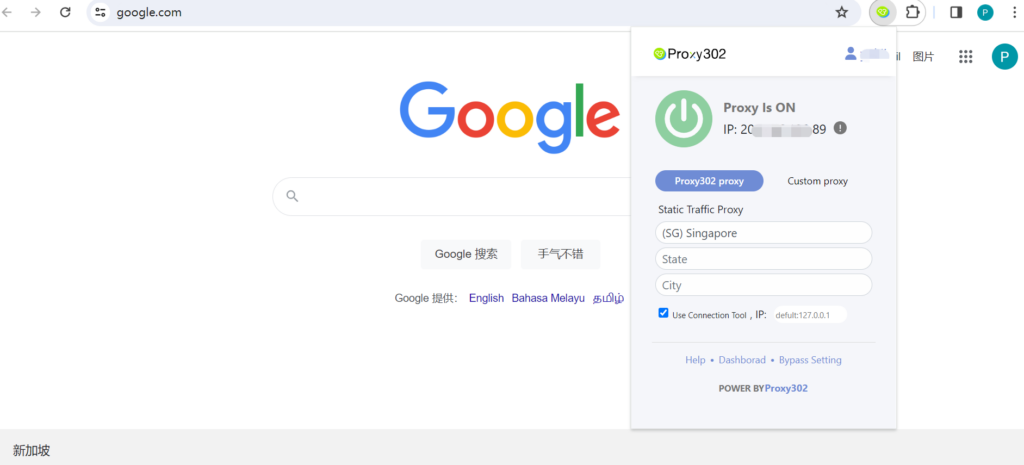
9. Click to open and access the added website. The Proxy302 browser plugin runs automatically, so there is no need to set up a proxy again.
1. Click [Quick Access] and click Add.
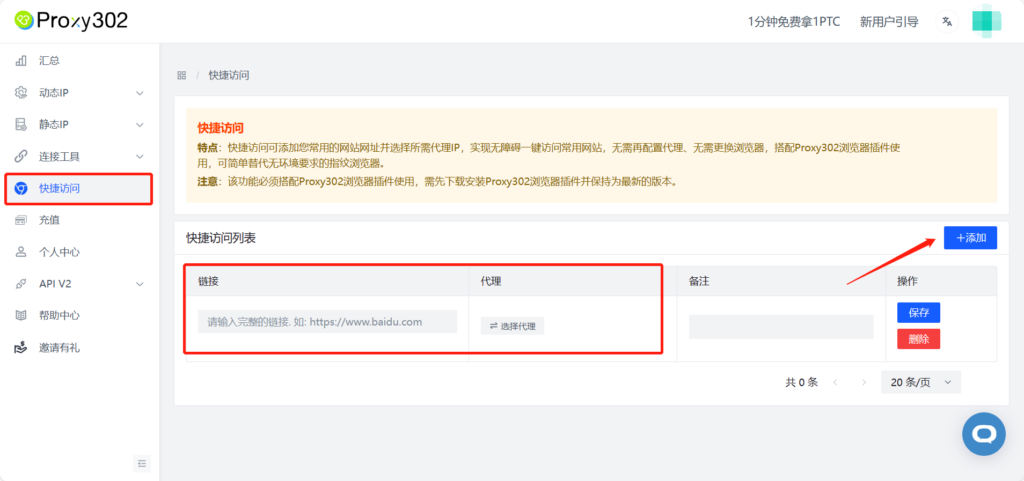
2. Enter the full link of the website you frequently visit (e.g., https://www.google.com) and click Select Proxy.

3. Select the required proxy. You can directly choose an already generated proxy IP (proxy IPs generated within the account are universal for this Quick Access feature), or you can generate a new IP.
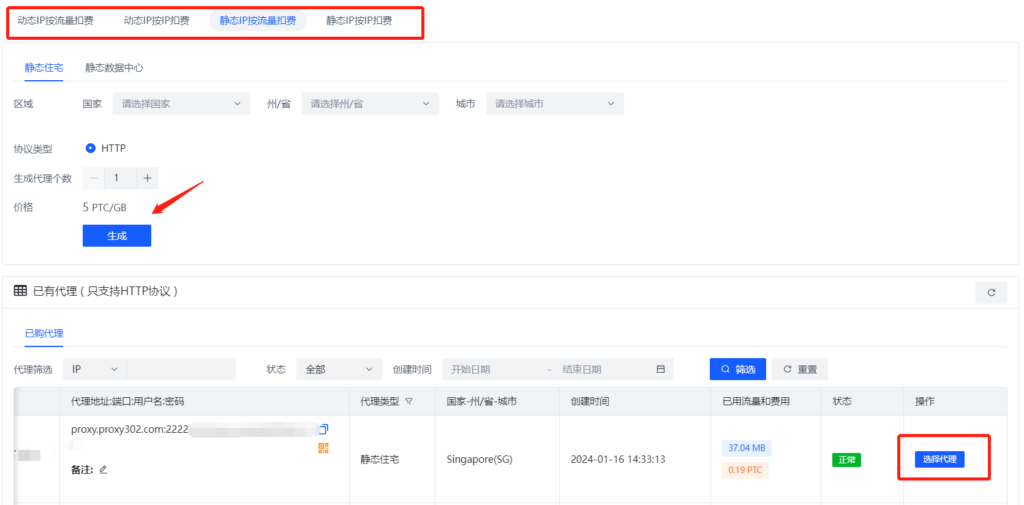
4. After selecting the proxy IP, click Save.
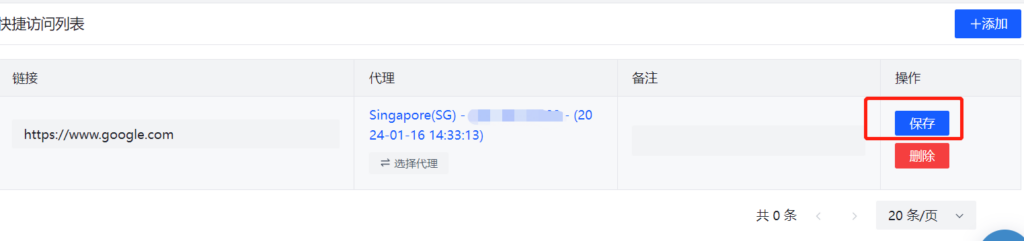
5. Click to open and access the added website. The Proxy302 browser plugin runs automatically, so there is no need to set up a proxy again.