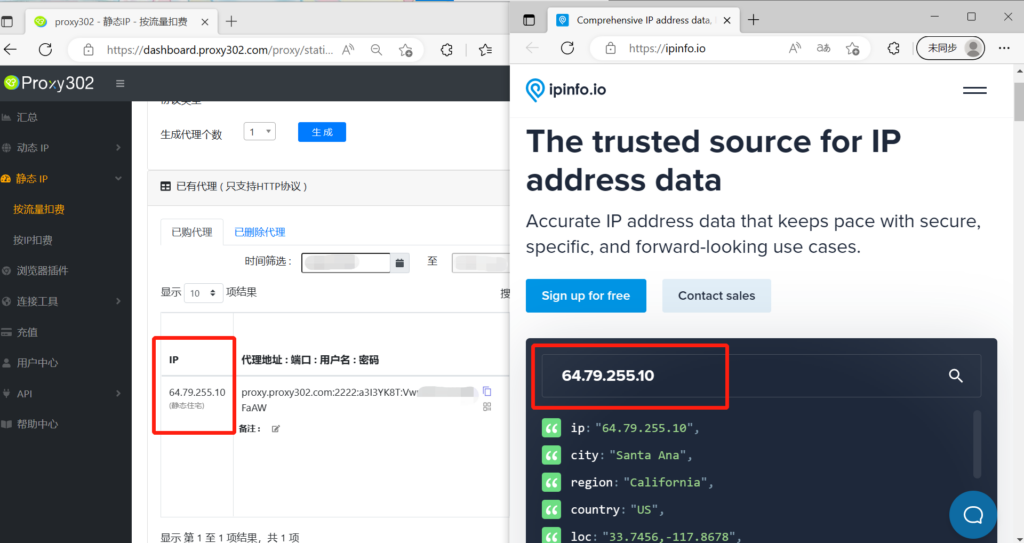
Microsoft Edge Browser - Proxy302 Extension
Legacy guide: screenshots and helper-tool steps may differ from the current product.
This is an English translation of a legacy guide. For the original wording, read the Chinese original.
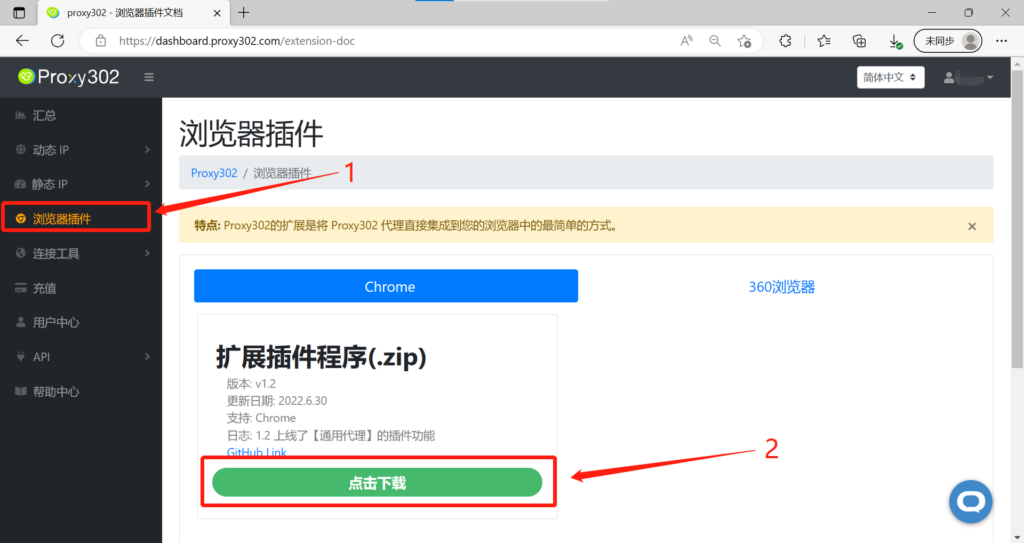
1. Log in to the Proxy302 client, open the [Browser Extension] interface, and download the [Extension Package].
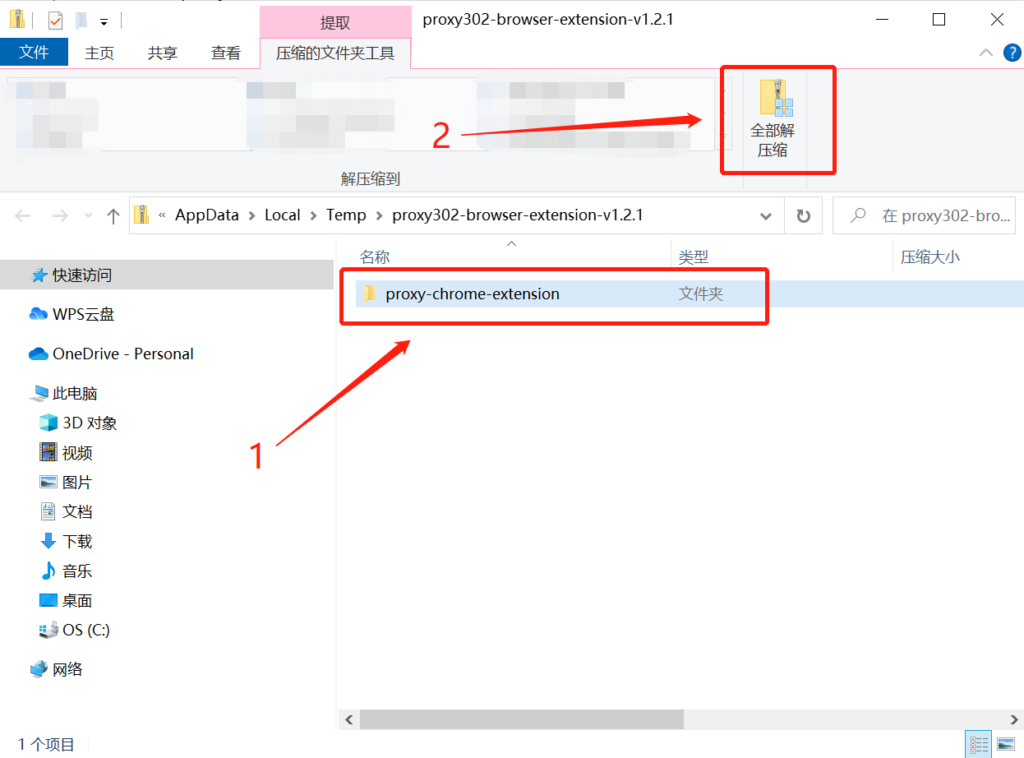
2. Select the [Proxy302-browser-extension] folder and click [Extract All].
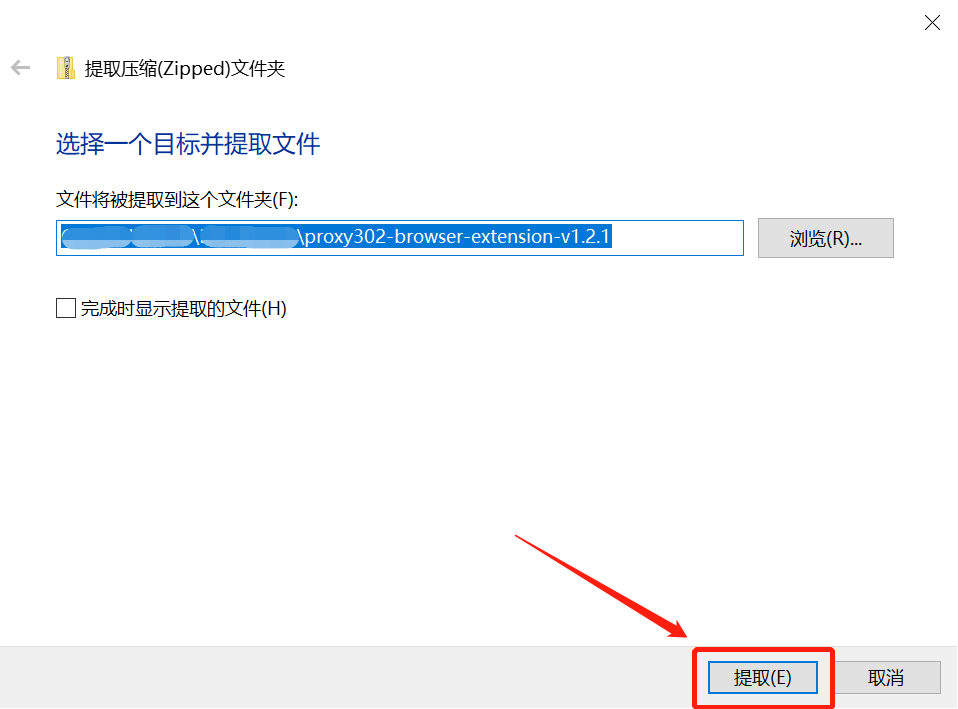
3. Click [Extract] and wait for it to load.
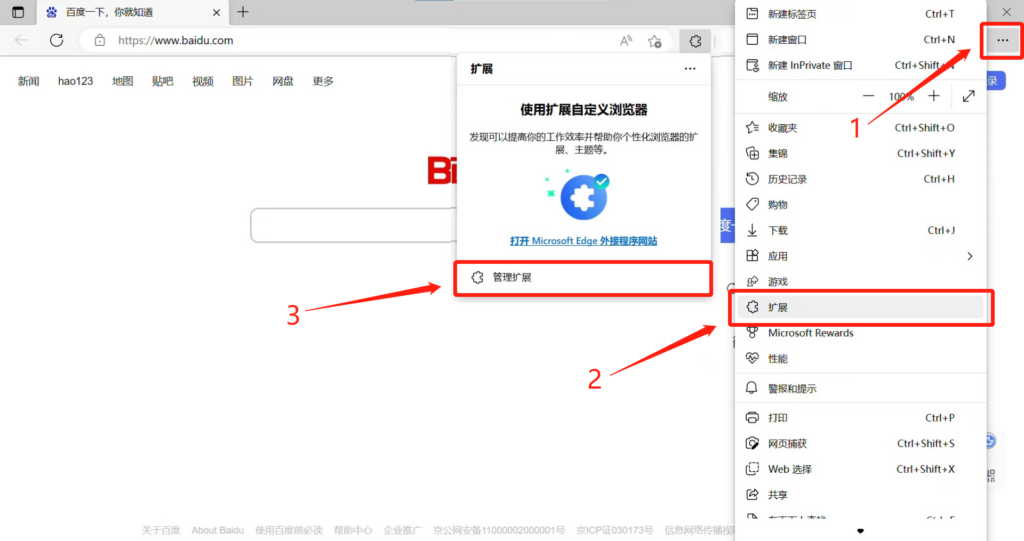
4. Open the Microsoft Edge browser, click the settings icon in the top right corner, and click [Extensions] - [Manage extensions].
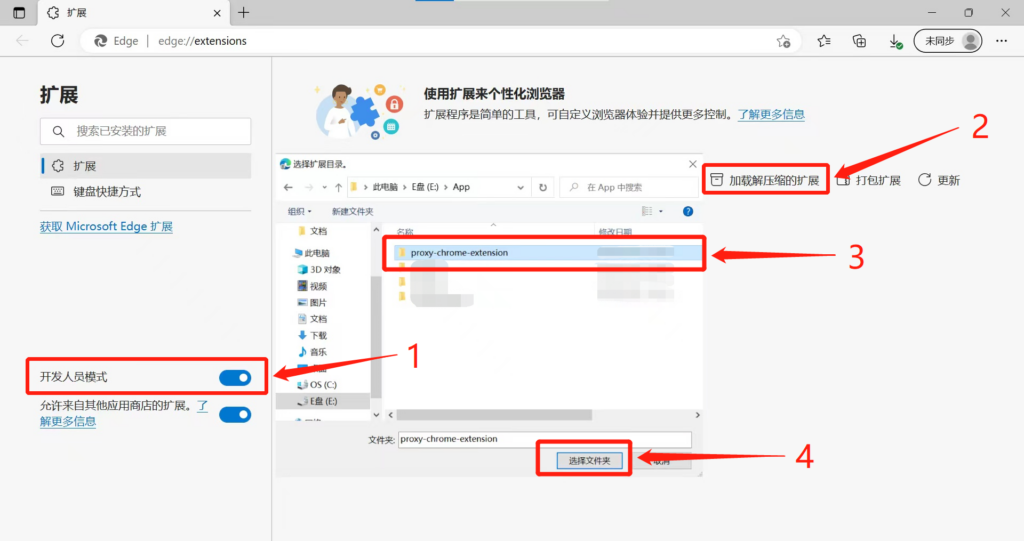
5. Enable [Developer mode], click [Load unpacked], and select the [proxy-chrome-extension] folder.
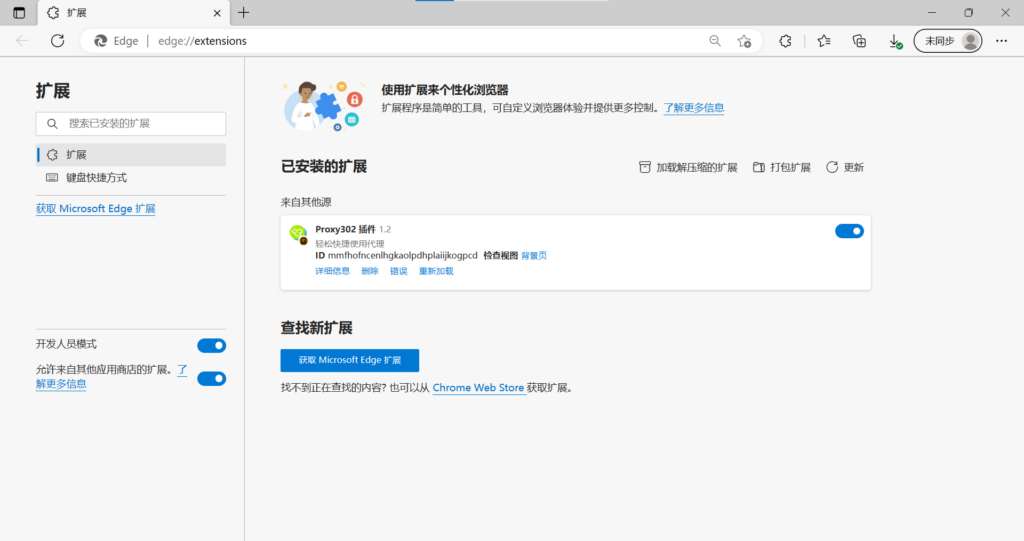
6. The Proxy302 extension has been successfully installed.
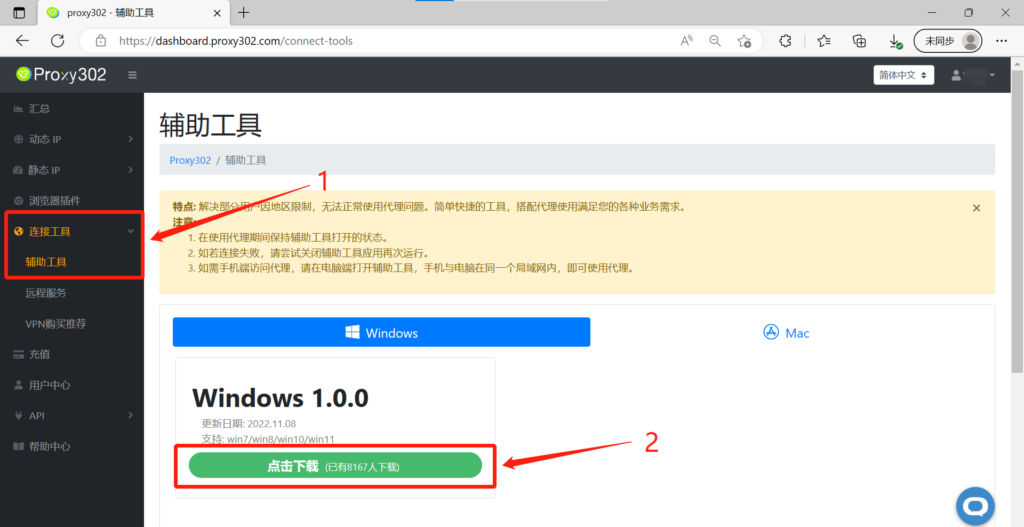
1. Open the Microsoft Edge browser, log in to the Proxy302 client, open [Connection Tools] - [Auxiliary Tools], and click to download.
2. Run the application.
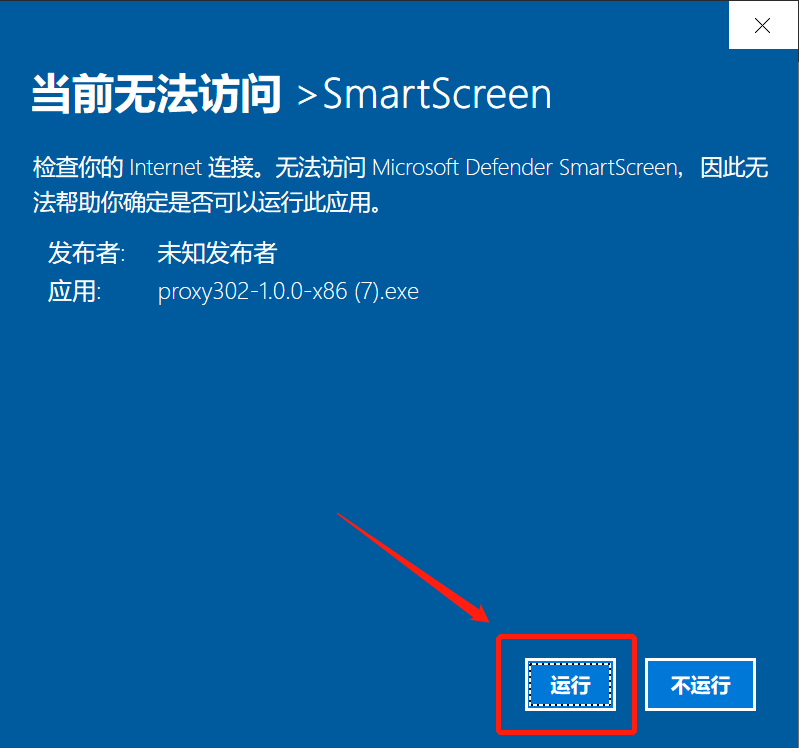
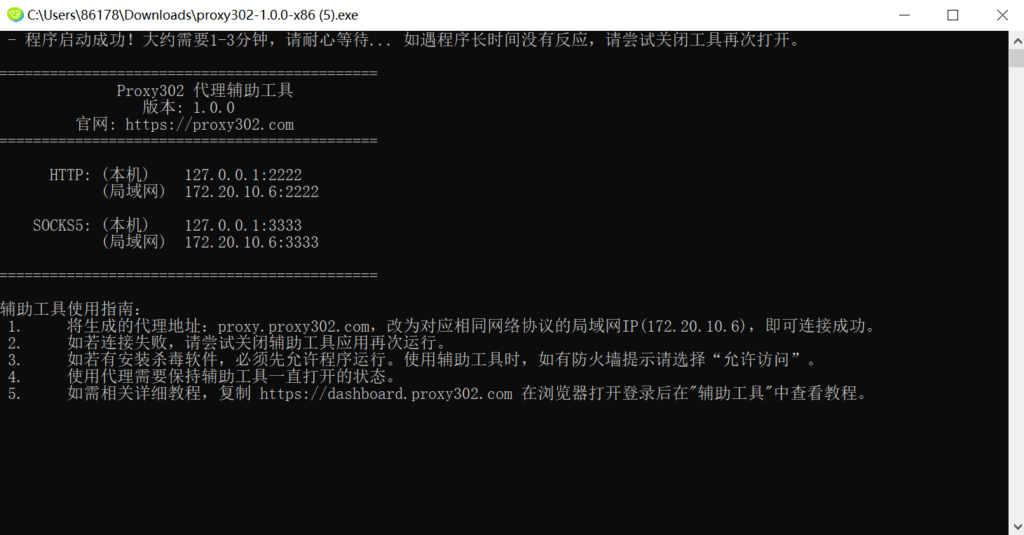
3. Wait for it to load. Once loaded successfully, as shown in the image below, the auxiliary tool has started. Minimize it to keep the auxiliary tool running in the background.
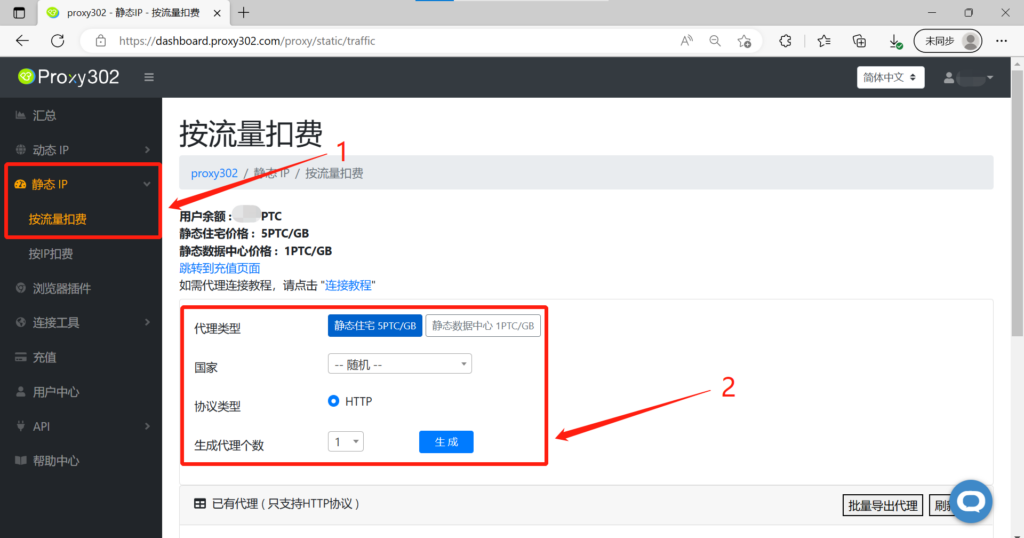
4. Select the required proxy type, country, and protocol type (HTTP/SOCKS5), then click Generate Proxy.
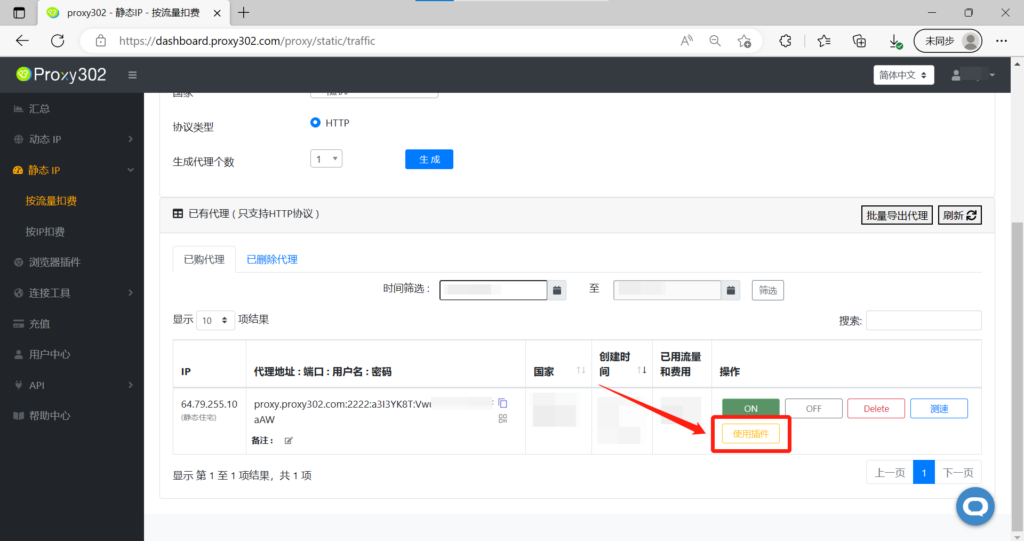
5. Click [Use Extension] and wait for the proxy settings to be applied successfully.
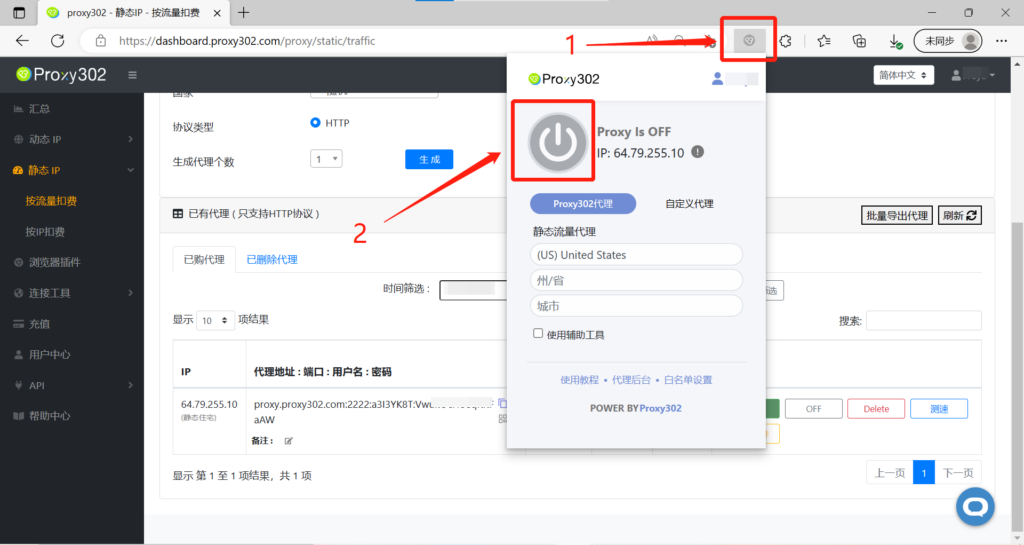
6. Open the Microsoft Edge browser, click the extension icon in the top right corner, and open the Proxy302 extension.
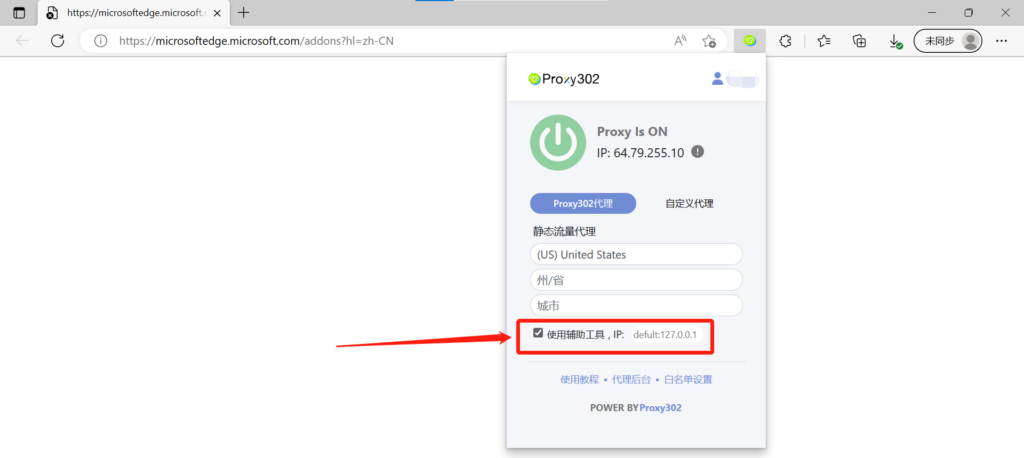
7. Check the [Use Auxiliary Tool] option. The extension will fill in the local IP by default; you can also manually change it to a LAN IP.
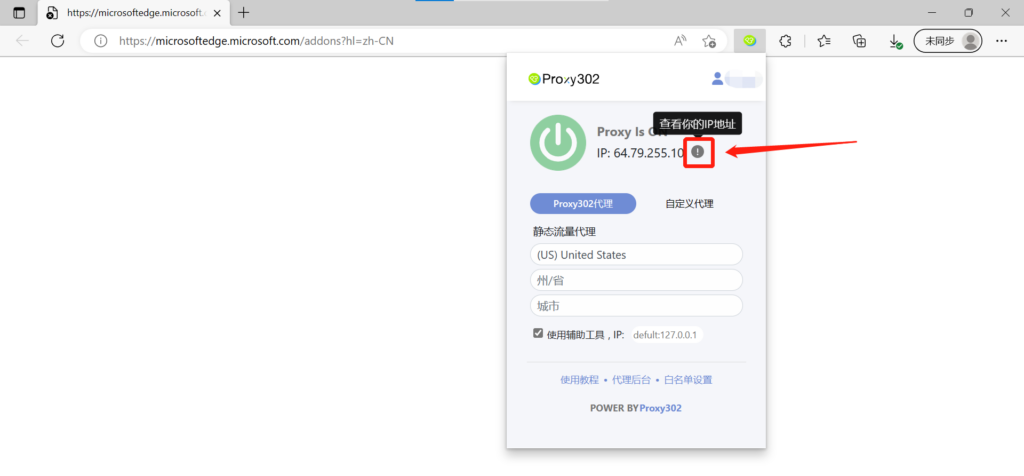
8. Click the icon to view the IP address.
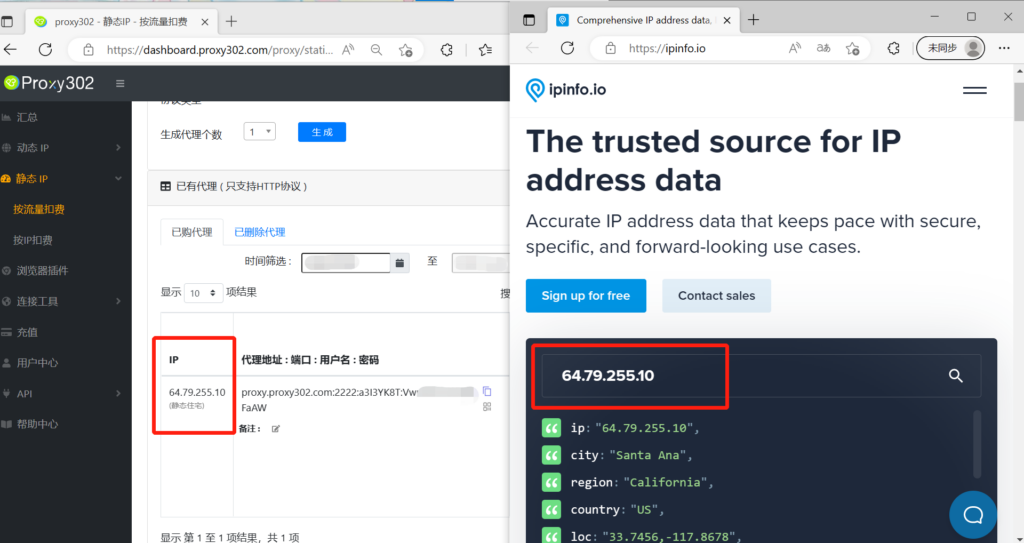
9. If the IP address on the page matches the proxy IP generated by Proxy302, the proxy has been set up successfully.
Connection Tutorial for Overseas Environments
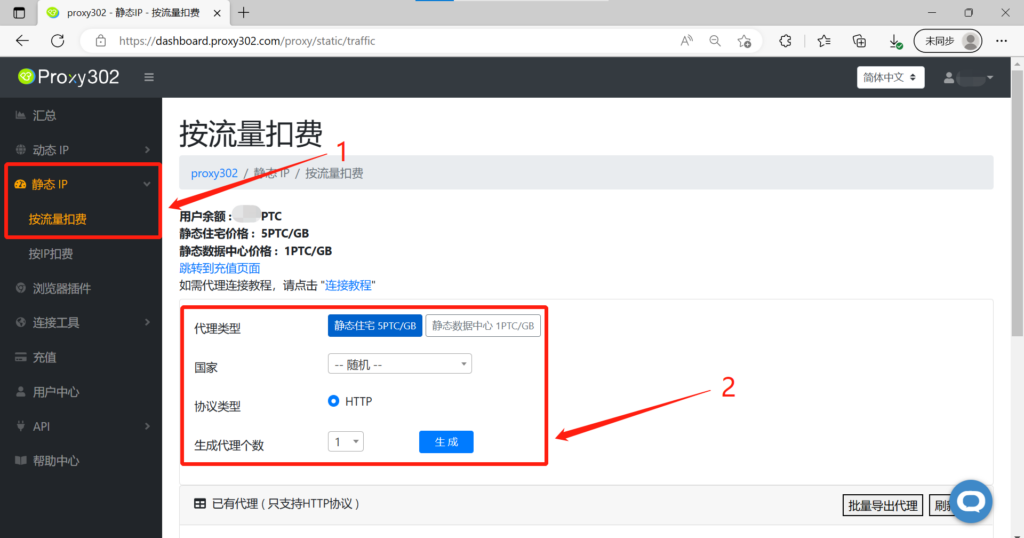
1. Open the Microsoft Edge browser, log in to the Proxy302 client, select the required proxy type, country, and protocol type (HTTP/SOCKS5), then click Generate Proxy.
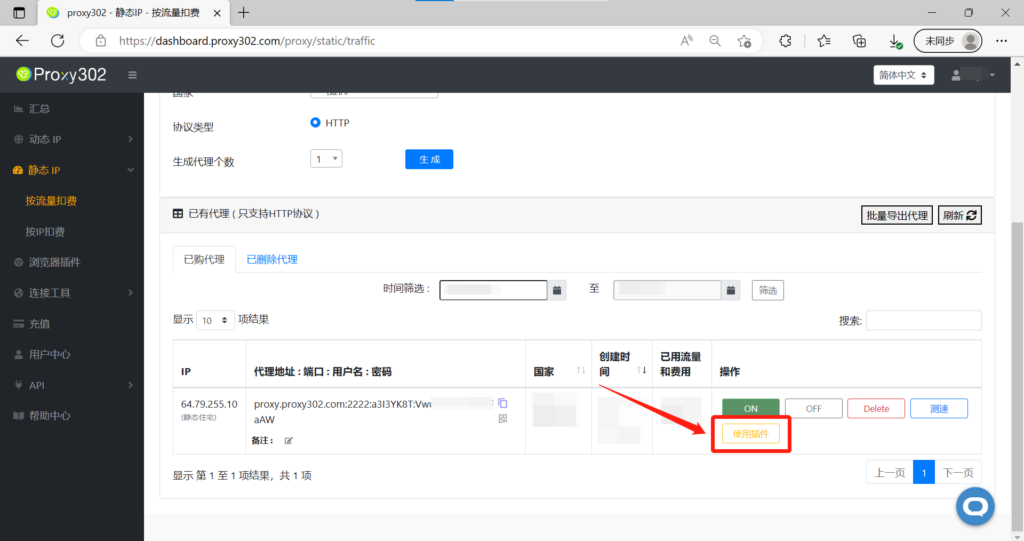
2. Click [Use Extension] and wait for the proxy settings to be applied successfully.
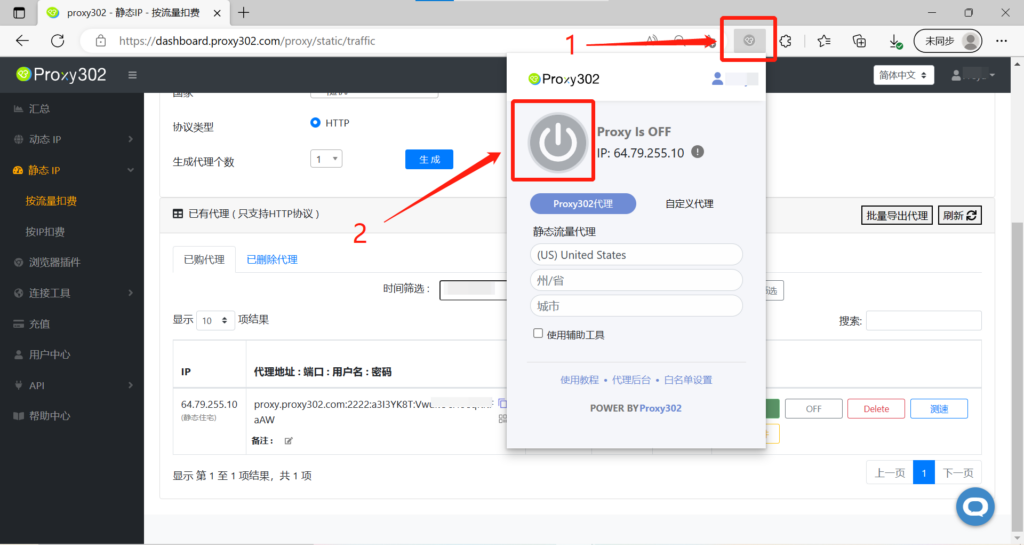
3. Click the extension icon in the top right corner and open the Proxy302 extension.
4. Click the icon to view the IP address.
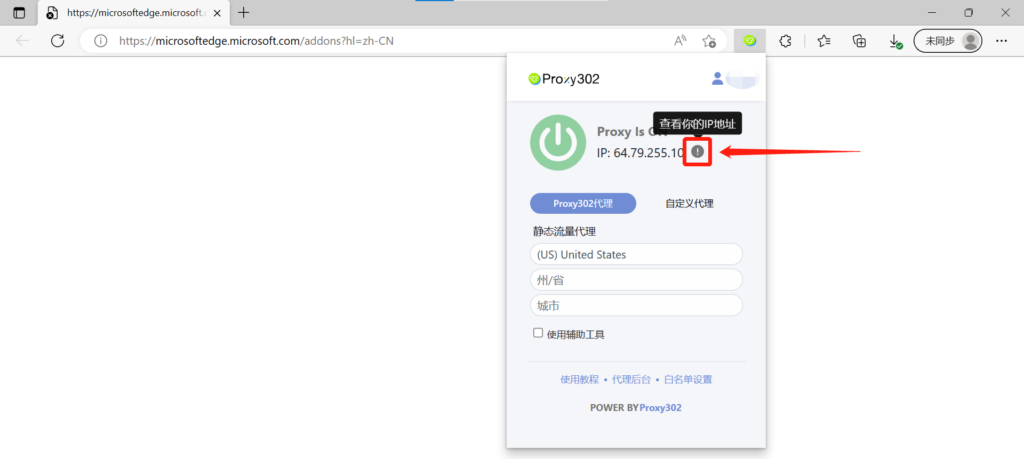
5. If the IP address on the page matches the proxy IP generated by Proxy302, the proxy has been set up successfully.